If you’ve been working with Shopify lately, you’ve probably noticed Shopify changed how admin access tokens are generated. When you just want to spin up a quick local project to test some GraphQL scripts or automate some flows, the whole setup can feel unnecessarily complicated.
Sure, Shopify has documentation on using the Admin API without using their pre-built app templates, but honestly? It’s confusing. I spent way too much time figuring this out, so I built a simple script that handles the OAuth flow for you. Now you can grab your token and start running scripts in minutes instead of hours.
In this guide, I’ll walk you through the entire process from start to finish.
Table of contents
Open Table of contents
Prerequisites
Before we get started, make sure you have:
- Access to the Shopify Dev dashboard
- Permission to install apps on the store where you want to test your scripts
- Node.js installed on your machine
- Basic familiarity with the command line
Step 1: Setting Up Your Local Project
First, let’s get the project running on your machine.
Clone the Repository
git clone https://github.com/meisjas/shopify-app-auth-expressjs
cd shopify-app-auth-expressjs
Install Dependencies
Open your terminal in the project directory and run:
npm installConfigure Environment Variables
Copy the example environment file:
cp .env.example .envOpen the .env file and add your store name:
SHOPIFY_SHOP=your-store-nameNote: Just use your store name without the .myshopify.com part. For example, if your store URL is sandbox-jaskaran.myshopify.com, just enter sandbox-jaskaran.
That’s it for now. We’ll add the client ID and secret in the next step.
Step 2: Creating Your App in Shopify Partners Dashboard
Now we need to create an app in your Shopify Partners dashboard to get the credentials we need.
Create a New App
- Head over to your Shopify Dev dashboard
- Click on Apps in the left sidebar
- Click the Create app button
- Give your app a name (something like “Local Dev Admin API” works great)
Configure Your App Settings
This is the important part. Set these configurations exactly as shown:
App URL:
http://localhost:3000/Embed app in Shopify admin:
FalseWebhook API version:
(Select the latest available version)Scopes:
Add the scopes you need for your scripts. You can check out Shopify’s full list of access scopes here.
Redirect URL:
http://localhost:3000/auth/callback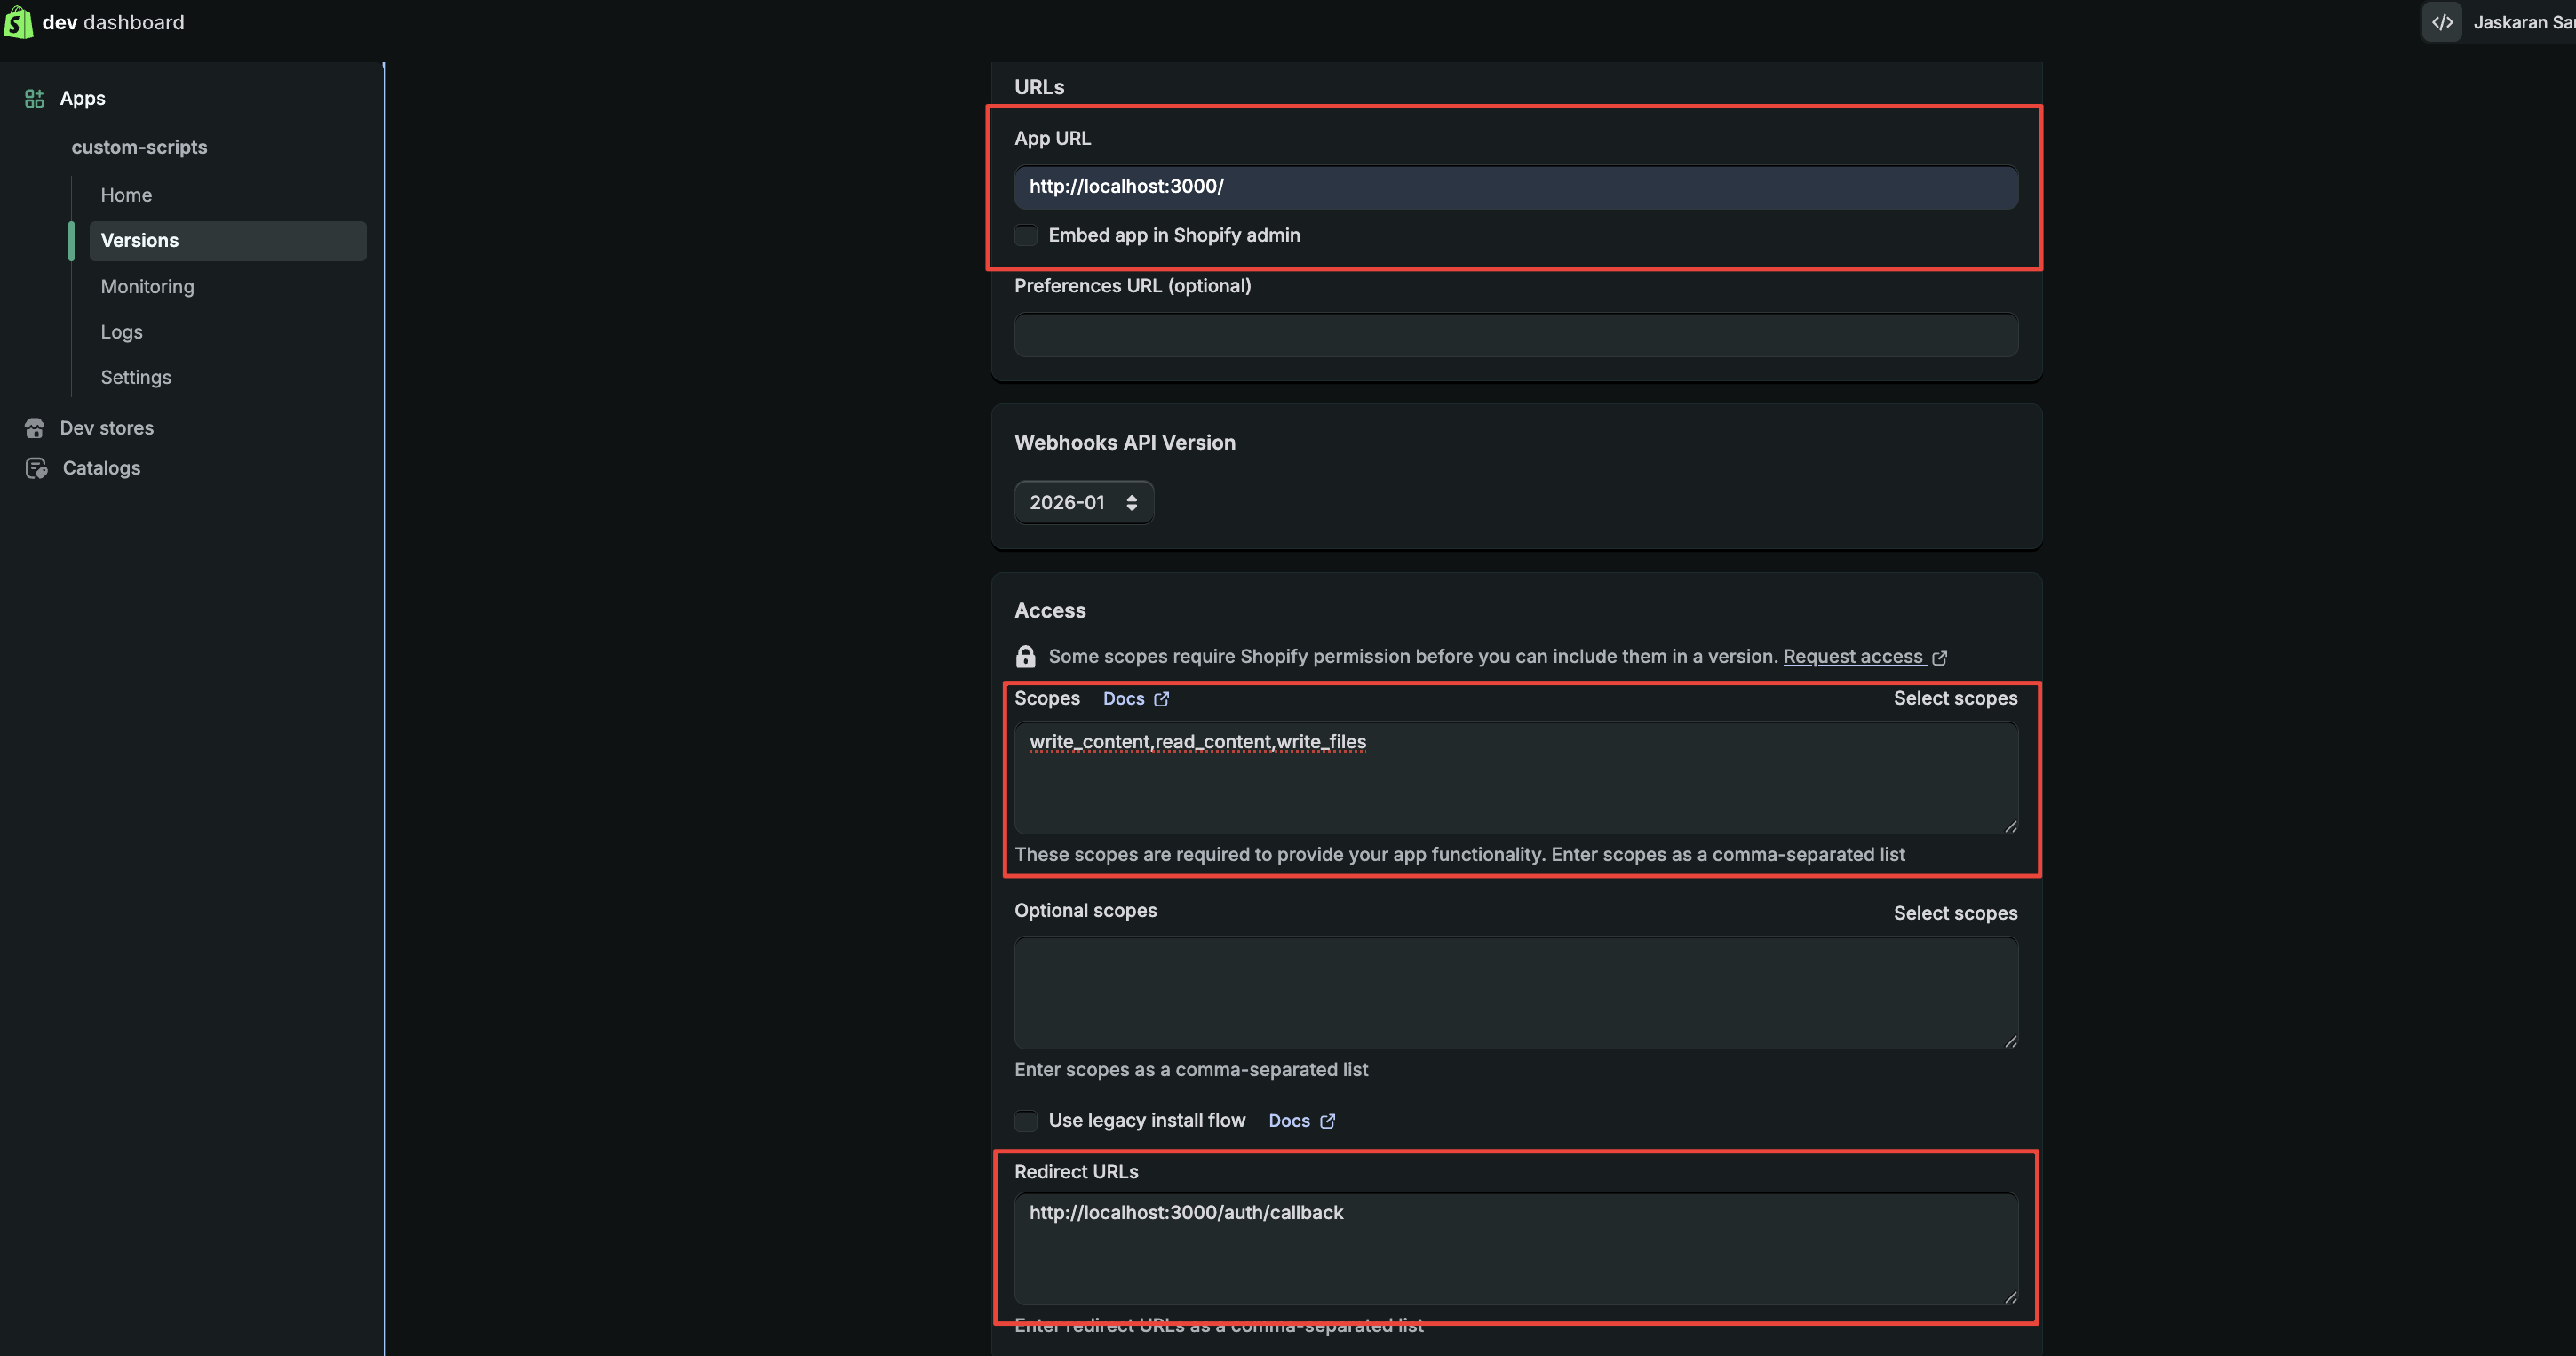
Once everything looks good, click Release.
Grab Your Client Credentials
After creating your app:
- Navigate to Settings in the left sidebar of your app
- You’ll see your Client ID and Client secret in the credentials section
- Copy both of these values
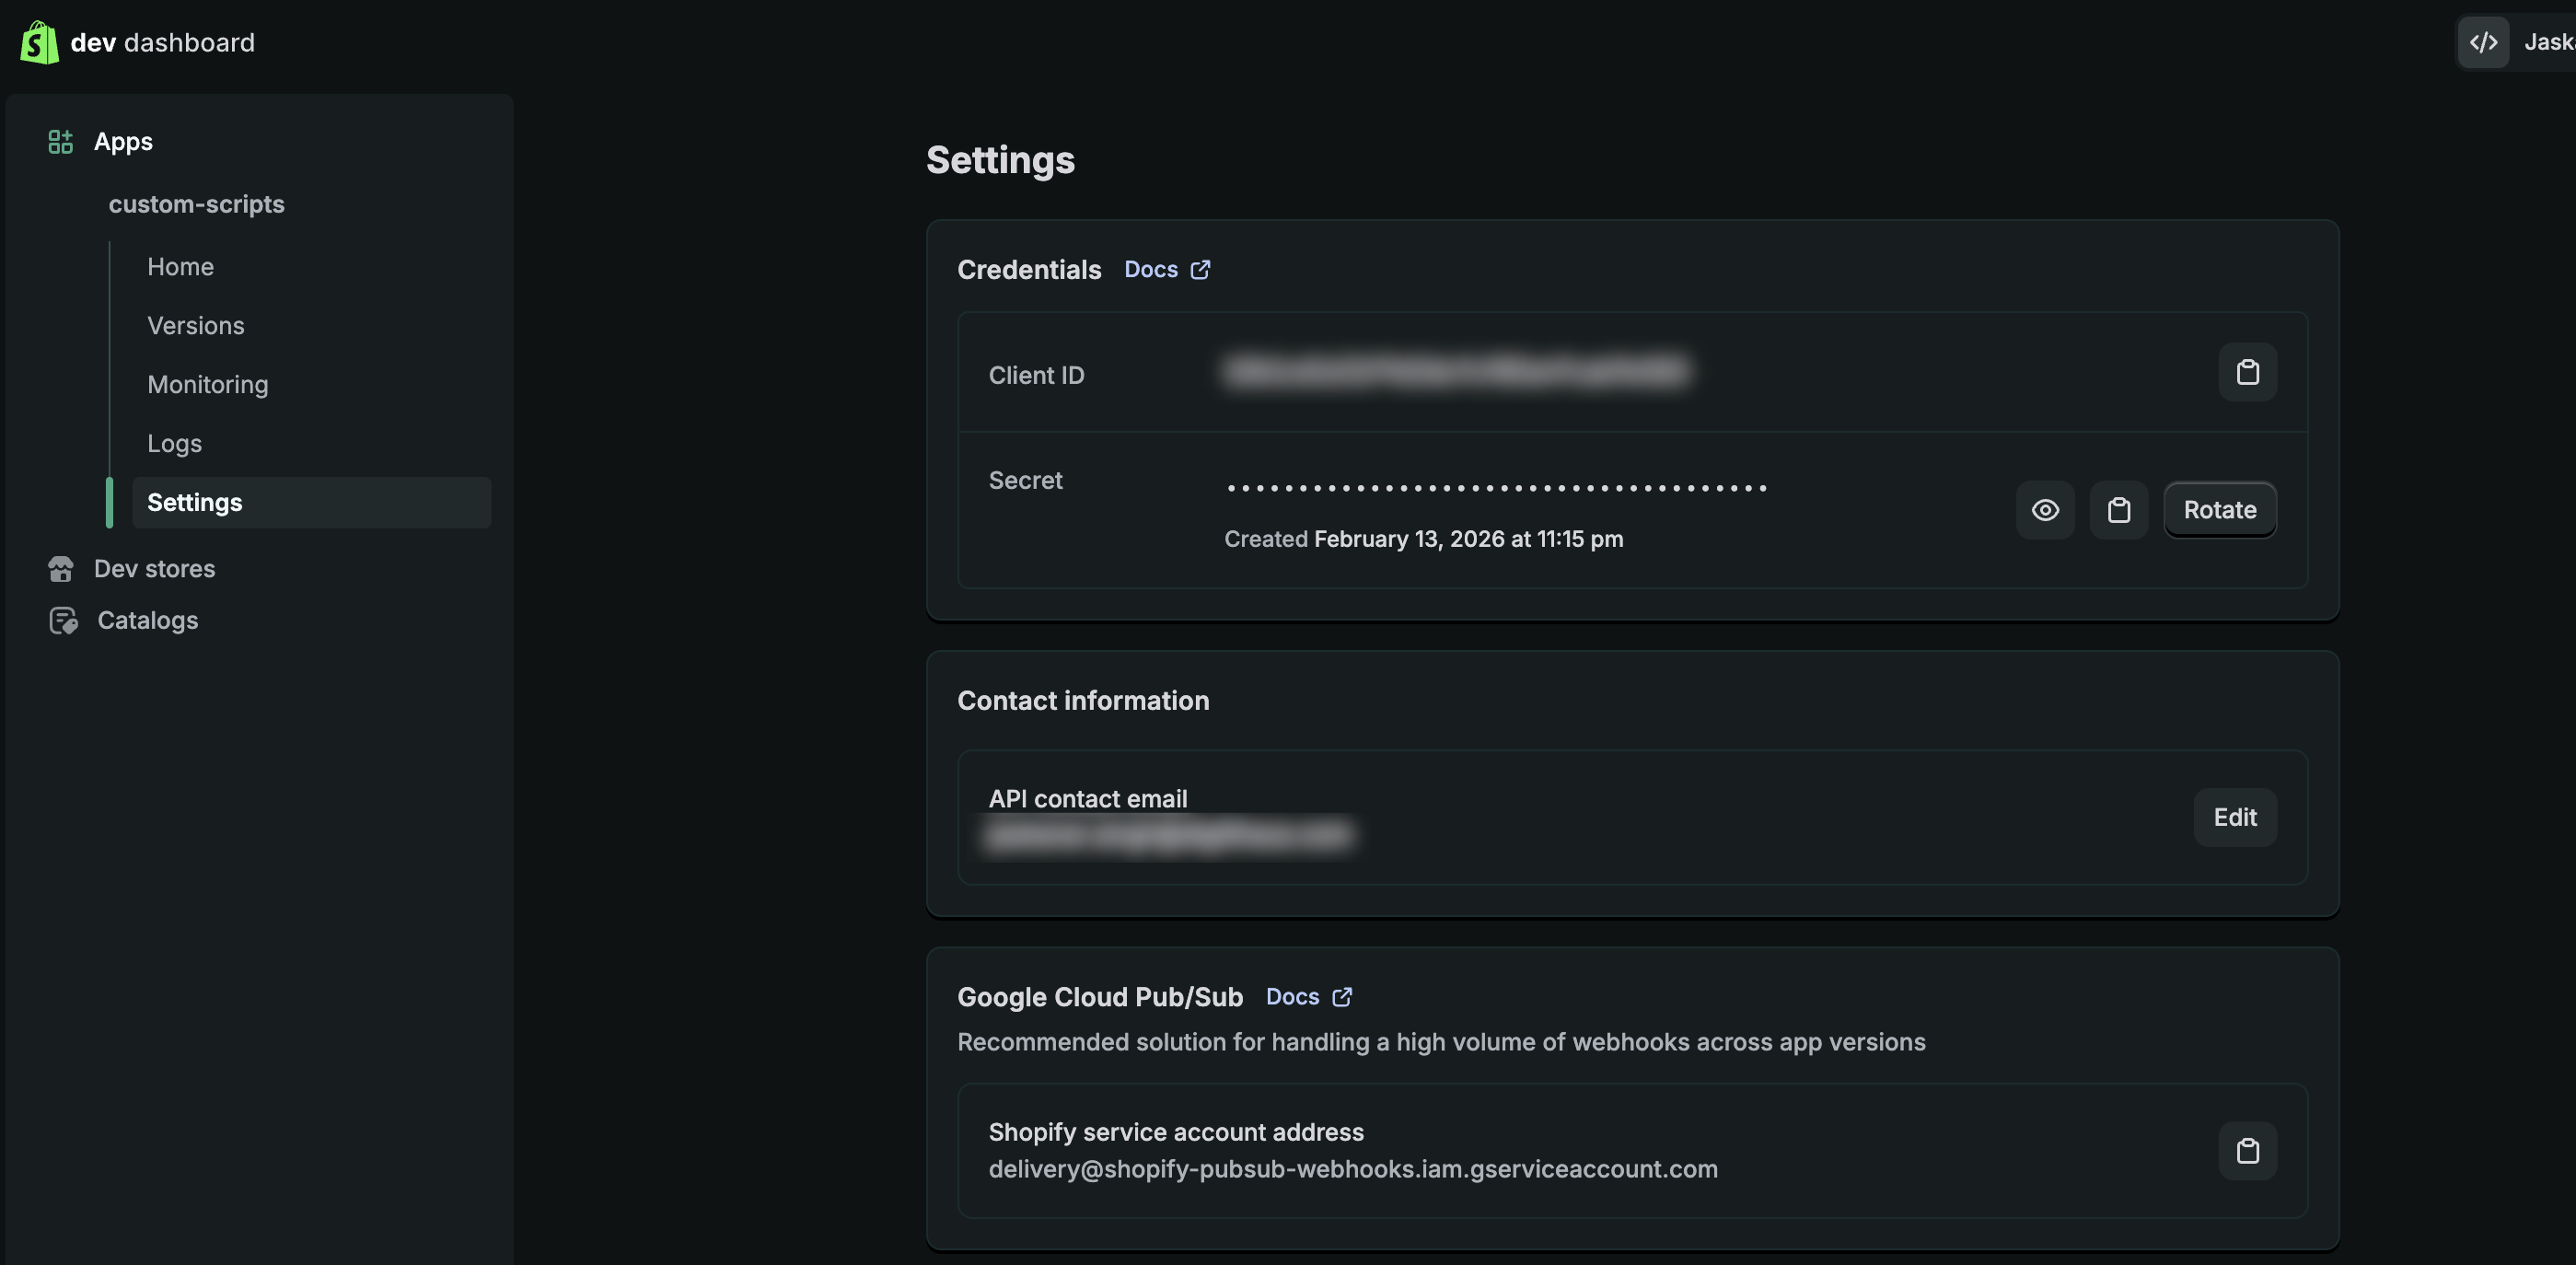
Add them to your .env file:
SHOPIFY_SHOP=your-store-name
SHOPIFY_CLIENT_ID=your_client_id_here
SHOPIFY_CLIENT_SECRET=your_client_secret_here
Step 3: Installing the App and Generating Your Token
Now comes the magic part where we actually generate the admin token.
Start Your Local Server
In your terminal, run:
npm run startYou should see something like this in your terminal:
Server running on http://localhost:3000
Install app at: http://localhost:3000/install?shop=your-store.myshopify.com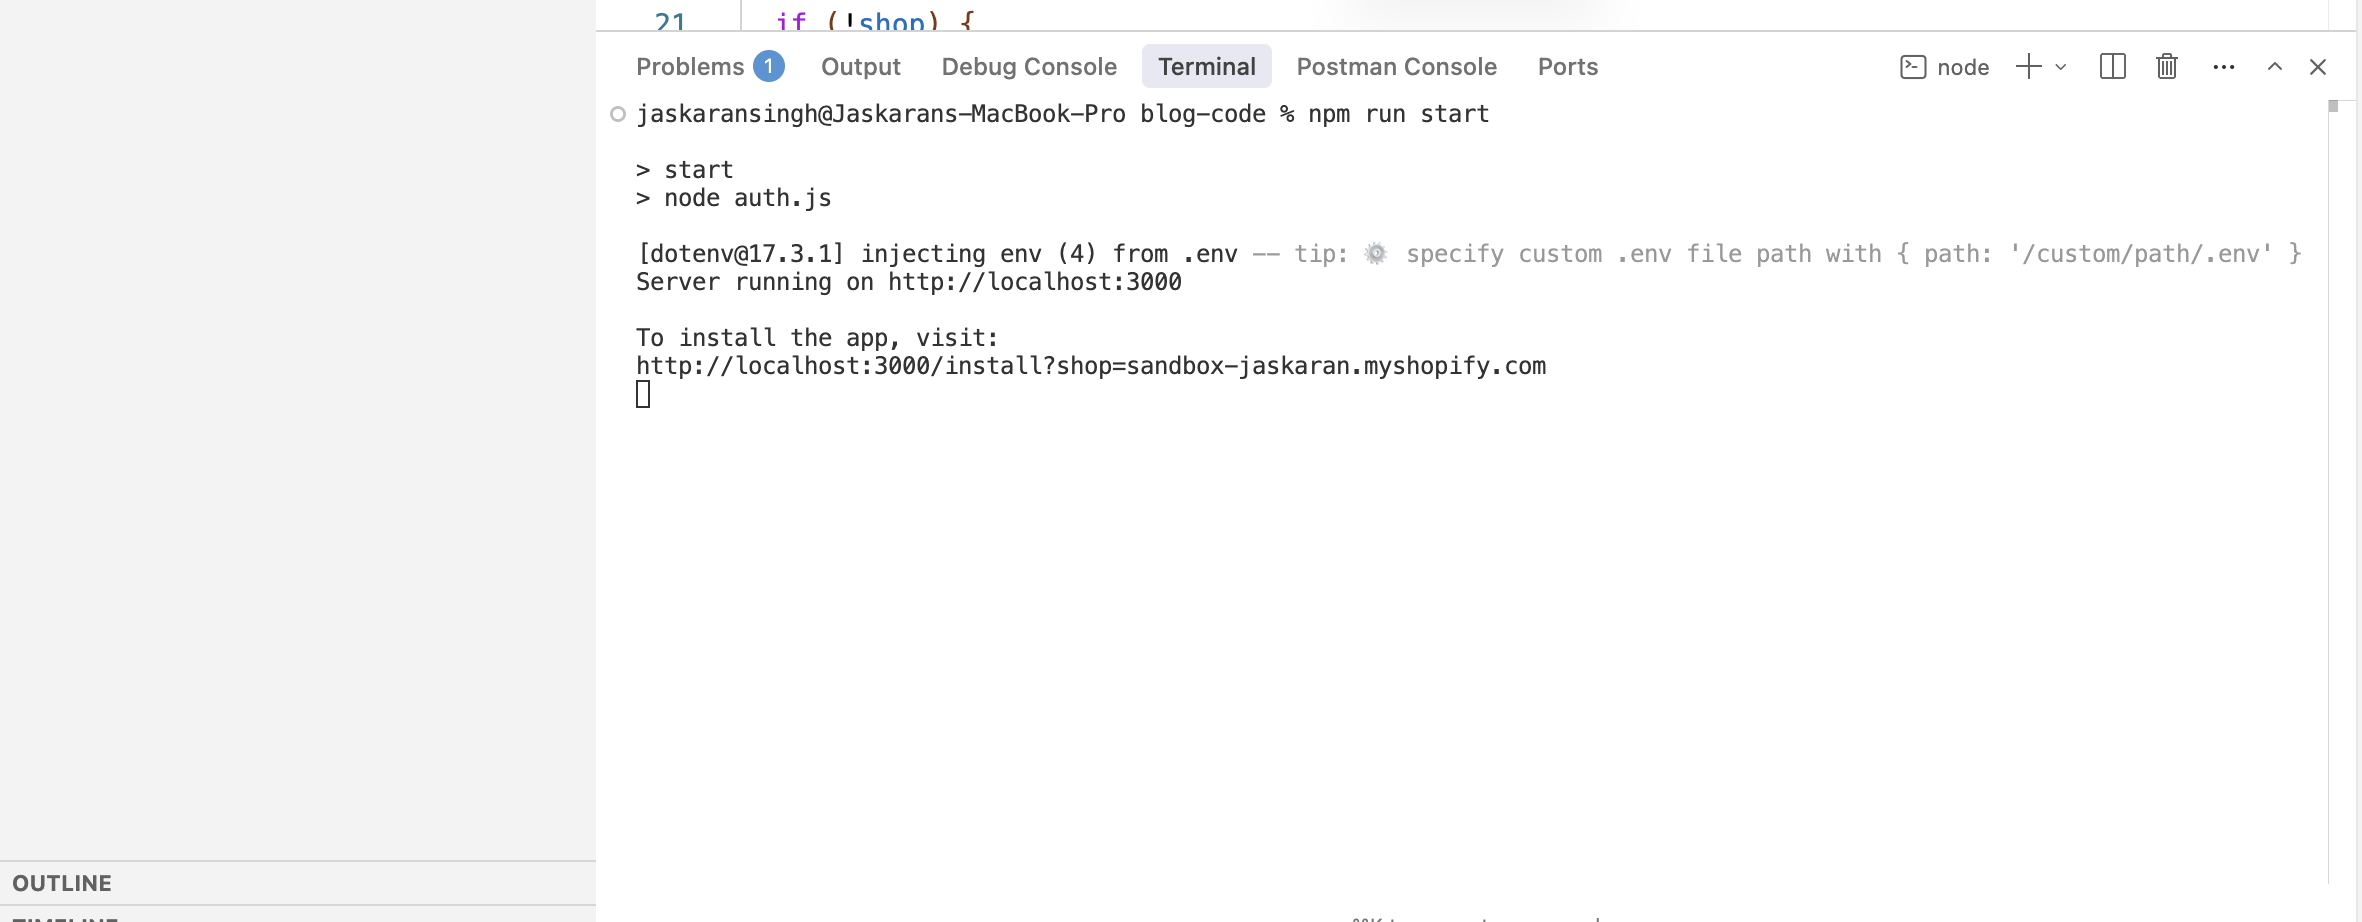
Install the App
- Open the install URL from your terminal (it should be
http://localhost:3000/install?shop=your-store.myshopify.com) - You’ll be redirected to Shopify to authorize the app
- Review the permissions and click Install app
Token Generated Successfully
Once the installation completes, the script automatically saves your admin access token to the .env file. Your final .env should look like this:
SHOPIFY_SHOP=your-store-name
SHOPIFY_CLIENT_ID=your_client_id_here
SHOPIFY_CLIENT_SECRET=your_client_secret_here
SHOPIFY_ACCESS_TOKEN=shpat_xxxxxxxxxxxxxxxxxxxxx
You’re done with the setup! Now you can start making API calls.
Step 4: Making API Calls
With your admin token ready, you can now make GraphQL requests to the Shopify Admin API. Here’s a clean helper function you can use:
async function graphql(query, variables = {}) {
  const response = await fetch(
    `https://${process.env.SHOPIFY_SHOP}.myshopify.com/admin/api/2026-01/graphql.json`,
    {
      method: "POST",
      headers: {
        "Content-Type": "application/json",
        "X-Shopify-Access-Token": process.env.SHOPIFY_ACCESS_TOKEN,
      },
      body: JSON.stringify({ query, variables }),
    }
  );

  if (!response.ok) {
    const text = await response.text();
    throw new Error(`HTTP ${response.status}: ${text}`);
  }

  const { data, errors } = await response.json();

  if (errors?.length) {
    throw new Error(`GraphQL errors: ${JSON.stringify(errors, null, 2)}`);
  }

  return data;
}
Example: Fetching Products
Here’s how you’d use this function to fetch your first 10 products:
const query = `
  query getProducts($first: Int!) {
    products(first: $first) {
      node {
        id
        title
      }
    }
  }
`;

const variables = { first: 10 };

const data = await graphql(query, variables);
console.log(data.products);
Example: Creating a Product
const mutation = `
  mutation createProduct($input: ProductInput!) {
    productCreate(input: $input) {
      product {
        id
        title
      }
      userErrors {
        field
        message
      }
    }
  }
`;

const variables = {
  input: {
    title: "My New Product",
    status: "DRAFT",
  },
};

const data = await graphql(mutation, variables);
console.log(data.productCreate);
You can find more query and mutation examples in the Shopify Admin API documentation.
Wrapping Up
And that’s it! You now have a working setup for running Shopify Admin API scripts locally. No more wrestling with OAuth flows every time you want to test something.
Access tokens are valid for 24 hours, after which they must be refreshed. To refresh the access token your app must make the same request to the token endpoint with the client credentials as in the previous step.
If you found this helpful or have any questions, feel free to drop a comment below. Happy coding!
Note: Remember to review Shopify’s API rate limits to avoid hitting throttling issues during development.